
︎ Note 28/10/2025:
The Gaea2Houdini workflow I’m showing seems to have been changed in recent Houdini + Labs versions. If you encounter issues with the nodes I’m showcasing in the next steps, please refer to the workflow in this video:
Introducing the new Gaea2Houdini for Gaea 2.
You might want to use the Gaea Terrain Processor node in Houdini 21 which allows you to build and expose your own Gaea nodes, kind of like you would define and use a custom HDA.
︎︎︎ Rolling out Gaea nodes
In recent SideFX labs packages, the Gaea 2 nodes should automatically ship inside Houdini. They definitely ship with SideFXLabs version 20.5.701 which I’m currently using alongside Houdini 20.5.550 here.
Another prerequisite is having Gaea 2 installed on your system. You might want to look out for the Professional license which ensures the bridge to Houdini - you can find out about Gaea and pricing options here. I’m not sure if the labs gaea nodes will work without having the standalone application on your system, feel free to try!
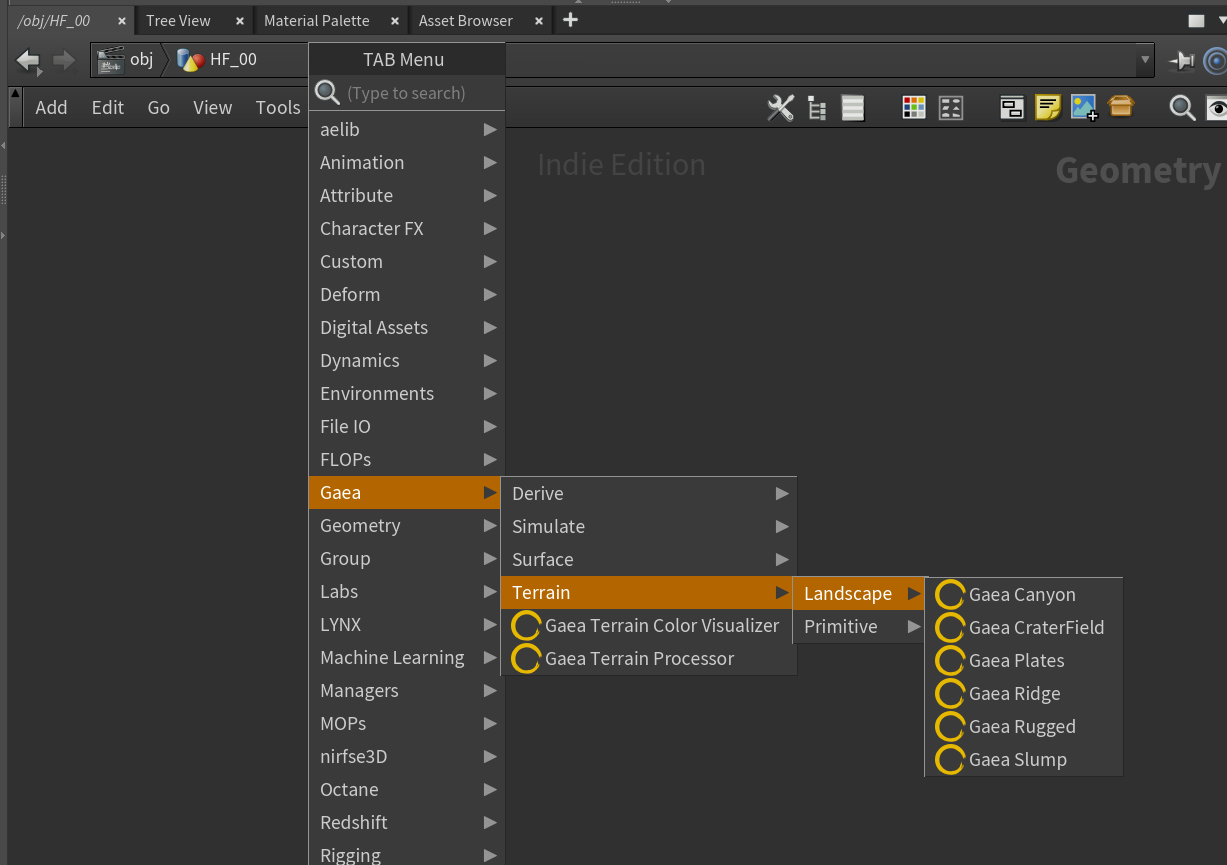
If everything is installed properly you should find the Gaea nodes in SOP context:
![]()
Another prerequisite is having Gaea 2 installed on your system. You might want to look out for the Professional license which ensures the bridge to Houdini - you can find out about Gaea and pricing options here. I’m not sure if the labs gaea nodes will work without having the standalone application on your system, feel free to try!
If everything is installed properly you should find the Gaea nodes in SOP context:

︎︎︎ Building the Terrain Solver
In a SOP container I’m starting off by dropping down a Gaea Mountain, which is actually a handy 2-node-combo consisting of a default Heightfield node and a Gaea Mountain node.
The Heightfield node is where you will specify the base resolution (detail) of the resulting terrain. Unfortunately it seems that currently the max resolution while working with Gaea nodes is limited to 4096x4096 (Grid Samples). Values above, by power of 2 (8192 etc.) seem to break any following cooking attempts down the line. Maybe this will get fixed or it could be an issue on my end.

I‘m adding a Heightfield Transform node to scale the overall mountain height a bit, as it might be good to compensate a bit for the erosion process that will happen per frame which seems to erode away from the initial height more or less aggressively.
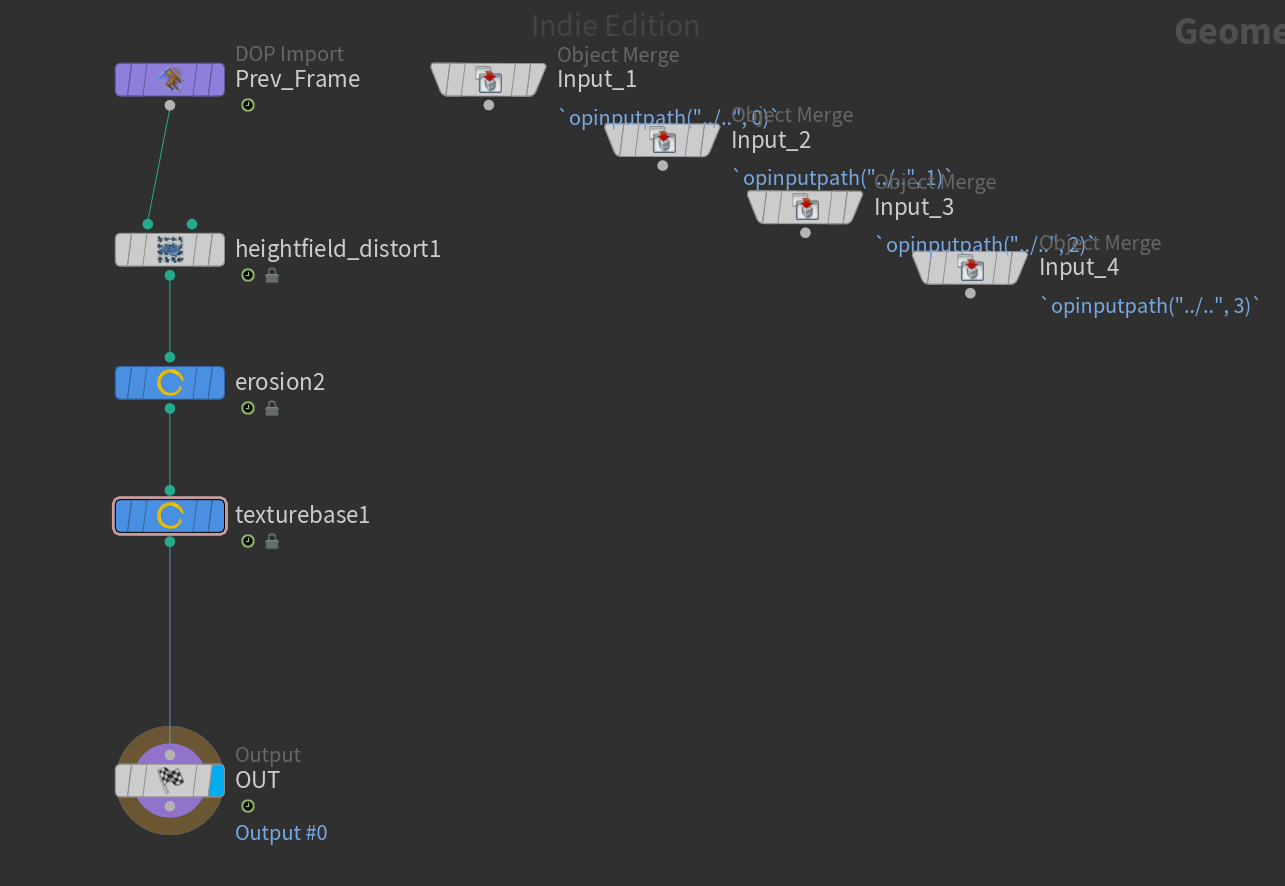
Next, we’ll pipe our static heightfield into a Solver SOP.
Diving into the solver, we’ll hook up just a few nodes directly into the “Prev_Frame” input:
1) Heightfield Distort (which creates a large, slow terrain movement, I’m animating the Offset X with a channel expression: $T*.000001
2) Gaea Erosion2 (does the actual heavy lifting and erosion sim, experiment with very subtle values like a single digit duration, no downcutting etc.)
3) Gaea TextureBase (creates a mask field based on flows and slopes which is pretty nice for using as a procedural shading texture later)
My solver chain looks like this:
![]()
Hop outside of the Solver SOP and play some frames, this is the main part of this setup and requires a lot of tweaking of the values inside heightfield_distort and erosion, as they might be quite heavy by default. It’s worth spending some time until you see a movement that you like.
If everything is happening too slowly, you can also always move back to the very initial heightfield node and lower the grid samples a bit for faster cooking (ie. 1024 or 2048). It’s probably also not a bad idea to drop down a filecache node after the solver, you might want to be aware of the filesizes on disk though. For my tests I kept everything in RAM preview which might be a bit... unhealthy. But it seems to have worked without bigger issues down the line so far.
Next, we’ll pipe our static heightfield into a Solver SOP.
Diving into the solver, we’ll hook up just a few nodes directly into the “Prev_Frame” input:
1) Heightfield Distort (which creates a large, slow terrain movement, I’m animating the Offset X with a channel expression: $T*.000001
2) Gaea Erosion2 (does the actual heavy lifting and erosion sim, experiment with very subtle values like a single digit duration, no downcutting etc.)
3) Gaea TextureBase (creates a mask field based on flows and slopes which is pretty nice for using as a procedural shading texture later)
My solver chain looks like this:
Hop outside of the Solver SOP and play some frames, this is the main part of this setup and requires a lot of tweaking of the values inside heightfield_distort and erosion, as they might be quite heavy by default. It’s worth spending some time until you see a movement that you like.
If everything is happening too slowly, you can also always move back to the very initial heightfield node and lower the grid samples a bit for faster cooking (ie. 1024 or 2048). It’s probably also not a bad idea to drop down a filecache node after the solver, you might want to be aware of the filesizes on disk though. For my tests I kept everything in RAM preview which might be a bit... unhealthy. But it seems to have worked without bigger issues down the line so far.

︎︎︎ Using COPS2 for live texturing in RS
The simulation steps are basically already done. There’s a neat way to pull the heightfield data into a COP (Copernicus) network and generate “live” texture sequences based on heightfields - that means: No need to cache any image sequences to disk!
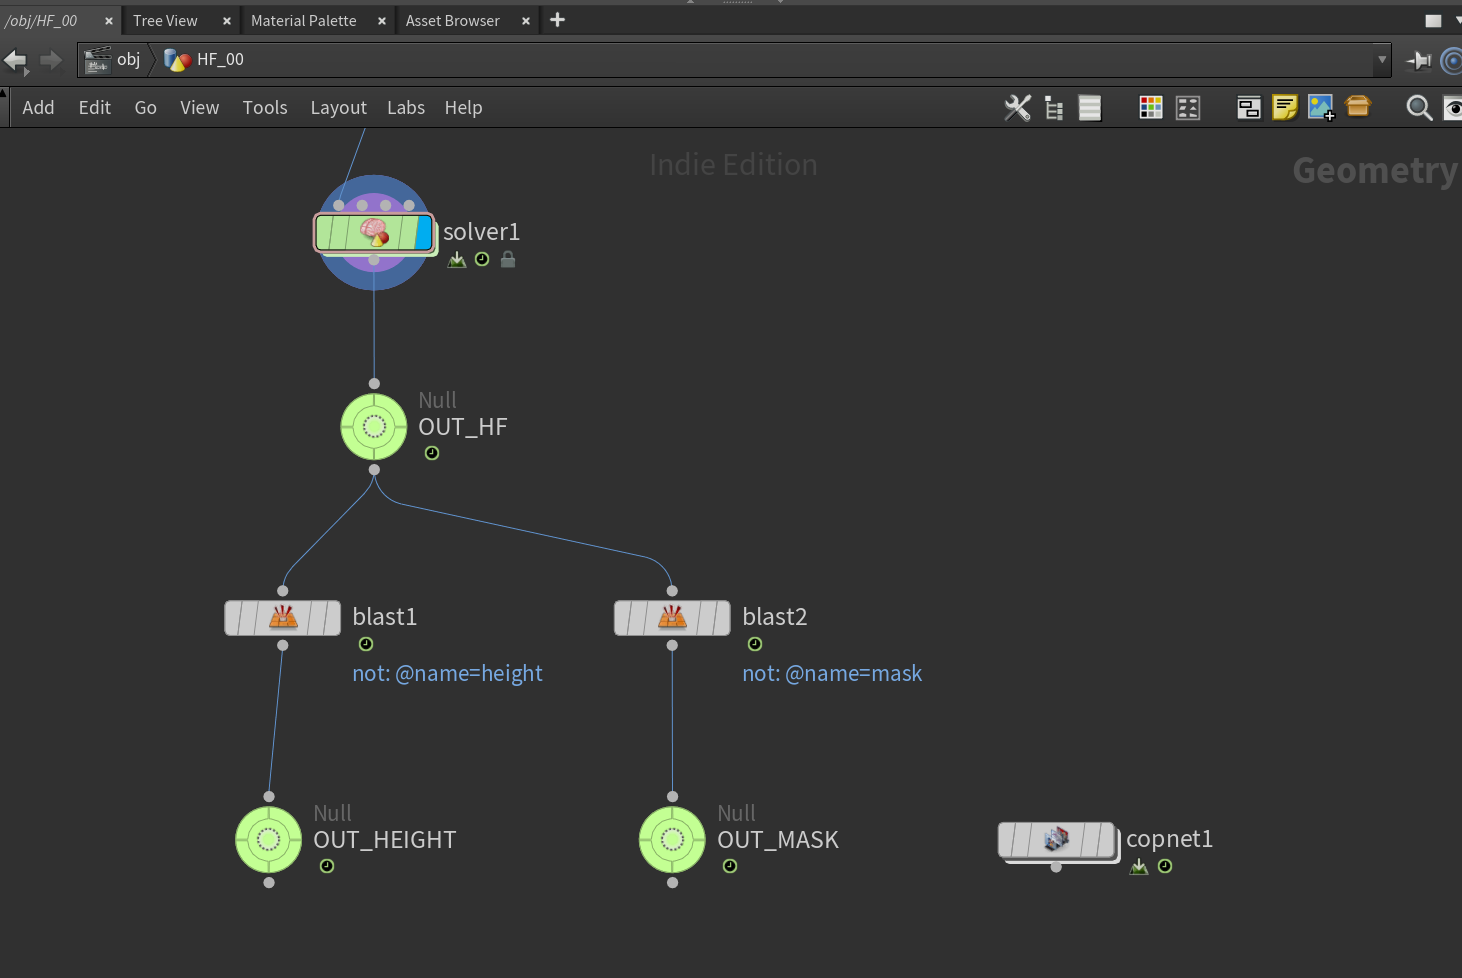
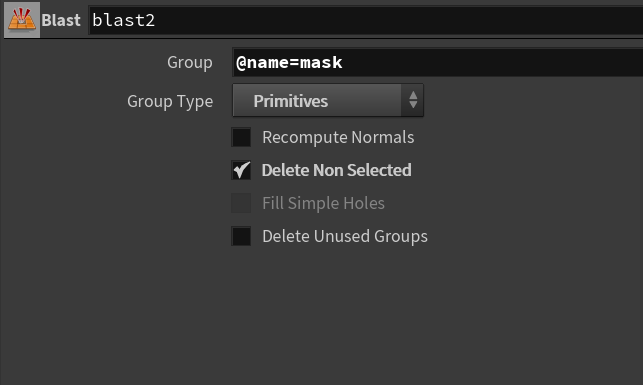
To do so, we’re gonna “split” out the heightfield data and mask (texture data) into two separate output nulls.
We can do this by dropping down 2 blast nodes which single out the “height” and “mask” primitives so that we can bring them into a COP network which we’ll create inside the same SOP context as well:
![]()
After diving into the COP network we just have to drop down 6 nodes. As we have two data streams to process (height and mask) we’ll create two short pipelines which process both of them into 2D texture space.
By putting down two SOP Import nodes we can pull in the nulls containing our height and mask data into Copernicus. Next, all that’s left is a Geo To Layer node on both horizontal streams which converts the data into something that can be processed in texture space (choose “mono” from the options on these nodes).
Finally, we’ll end our work in COPs with two nulls (HEIGHT and MASK):
![]()
To do so, we’re gonna “split” out the heightfield data and mask (texture data) into two separate output nulls.
We can do this by dropping down 2 blast nodes which single out the “height” and “mask” primitives so that we can bring them into a COP network which we’ll create inside the same SOP context as well:
After diving into the COP network we just have to drop down 6 nodes. As we have two data streams to process (height and mask) we’ll create two short pipelines which process both of them into 2D texture space.
By putting down two SOP Import nodes we can pull in the nulls containing our height and mask data into Copernicus. Next, all that’s left is a Geo To Layer node on both horizontal streams which converts the data into something that can be processed in texture space (choose “mono” from the options on these nodes).
Finally, we’ll end our work in COPs with two nulls (HEIGHT and MASK):


︎︎︎ Preparing the Render Geo
To render the mountain inside RS we can create a new, simple plane geometry as we will make use of the height data and displace it on rendertime. This might be way more efficient than having to convert our heightfield frame by frame into high resolution geometry.
Create a fresh SOP container on obj level, call it something nice, like “RENDER”. Dive inside, create a 1000x1000 grid (matching the width of our heightfield) and give it a reasonable amount of subdivisions (like 200x200).
Currently we don’t have UVs, so we’ll drop down an UV Project node where everything can be left at default except for scale (1000x1000) and rotation (90,0,0) to match the orientation and layout of our previous heightfield mountain.
It might also be helpful to append an UV Transform after, where we will scale the UVs down just slightly to avoid any boundary edge artifacts that can occur during displacement in Redshift.
![]()
Create a fresh SOP container on obj level, call it something nice, like “RENDER”. Dive inside, create a 1000x1000 grid (matching the width of our heightfield) and give it a reasonable amount of subdivisions (like 200x200).
Currently we don’t have UVs, so we’ll drop down an UV Project node where everything can be left at default except for scale (1000x1000) and rotation (90,0,0) to match the orientation and layout of our previous heightfield mountain.
It might also be helpful to append an UV Transform after, where we will scale the UVs down just slightly to avoid any boundary edge artifacts that can occur during displacement in Redshift.

![UV Project: Rotate [90 , 0, 0], Scale [1000, 1000, 0]](https://freight.cargo.site/t/original/i/b7f2d360baeb227f9e37172fe789150afb780200fc21ec01bc1bfb47ffc0b941/Screenshot-2025-08-30-163459.png)
![UV Transform: Scale [.99, .99, 1], Pivot [0.5 , 0.5, 0] to scale down from center](https://freight.cargo.site/t/original/i/d3dd8f1a91c5471b14f2eb75b650ff6d034685772fea78454c1bf487a13fed83/Screenshot-2025-08-30-163535.png)
Diving out one level and selecting our RENDER container, we can already prepare the RS displacement settings. The Maximum Displacement value depends on scene scale, a value of 1000 seems to work quite well with a default heightfield width of 1000x1000 in mind.
![]()

︎︎︎ Redshift Shader and finalizing the Setup
To “procedurally” link our HEIGHT and MASK data from COPs directly into an RS Material, we can make use of the “op: syntax”.
I don’t really understand how it works, but it’s a way to pull data that already lives inside of a Houdini project directly into Redshift without having to go the conventional way of writing and reading image sequences to and from disk.
Navigate to MAT context, create a RS MaterialBuilder node, dive inside and create an RS Texture node.
Go back into your COP network and copy (ctrl+c) the first output null, called “HEIGHT”.
Next, paste (ctrl+v, from clipboard) directly into the Filename tab inside your RS Texture node. You’ll get the global path to the HEIGHT node as a filename.
Finally, you’ll need to add a prefix called op: and a suffix called [$F] to the Filename: op:/obj/HF_00/copnet1/HEIGHT[$F]
[$F] will ensure that the COP output gets updated properly frame by frame when rendering to disk via RS ROP.
Repeat the exact same steps from above but for the “MASK” output null living inside your COP net.
You can now link the height texture into a displacement shader node and use the mask for any colouring via ramps, or even derive some simple bump, roughness etc from it, you get the idea.
For the height node, it might be important to set Color Space to “auto” to ensure there’s enough floating data coming through for the displacement to work nicely. I set the Color Space for mask to “sRGB”. You might need to experiment and see what looks good to you in RS Renderview.


Don’t forget to assign the Material to your RENDER container!
You might want to fire up RS and see if everything works properly, and move from there.


︎︎︎ Closing Thoughts
I’m keen on diving more into experimenting with native heightfields in general, there is a whole topic about advection techniques, VOPs and Houdini’s own erosion solver which I’m not able to cover at this point.
Hopefully there are some things that might be useful to pick up from this anyways, and I’ll considering updating with new findings. That said, hopefully you are able to pick some useful info out of here even if you don’t have access to Gaea.
An aspect that bothers me slightly is the amount of jitter that happens in the texture generation inside the Solver SOP, maybe there are ways to polish, interpolate the frames a bit, via COPs for example, although it’s just a little caveat in my eyes at this point.
It feels astounding how COPs is easily capable of keeping things inside Houdini, these live-textures are one of the biggest takeaways for me while approaching this experiment — I love this way of working.
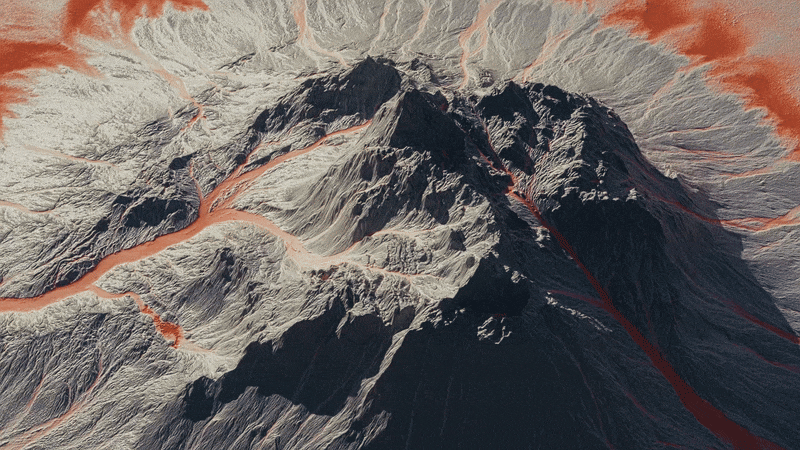
Lastly, I can highly recommend looking at Gaea 2 in general, it’s a very nice niche tool to have as a motion designer and it comes with a fair pricing philosophy. Their terrain simulation feels really precise, offers high resolution exports and the team seems to be actively working on new updates which is great.
Thanks for reading!
︎︎︎ Links & Resources
— Highly inspirational project with more insights on simulated erosion and river meandering (Robert Hodgin): roberthodgin.com
— Introduction on Gaea2 nodes in Houdini (QuadSpinner): youtube
— Live Rendering Of Heightfields in RS, Houdini (Entagma): youtube